基于Netty手写一个简易的Tomcat容器
本文主要基于传统的BIO来实现一个简单的Http请求处理过程;
1、Servlet请求无非就是doGet/doPost,所以我们定义抽象Servlet记忆GET/POST方法;
2、基于Netty API实现CS通信;
3、模拟Spring加载配置文件,注册请求以及控制器;

Netty版本
1
2
3
4
5
| <dependency>
<groupId>o.netty</groupId>
<artifactId>netty-all</artifactId>
<version>4.1.6.Final</version>
</dependency>
|
GlRequest 基于Netty&HttpRequest的API操作,非常简单
1
2
3
4
5
6
7
8
9
10
11
12
13
14
15
16
17
18
19
20
21
22
23
24
25
26
27
28
29
30
31
32
| public class GlRequest {
private ChannelHandlerContext ctx;
private HttpRequest req;
public GlRequest(ChannelHandlerContext ctx, HttpRequest req) {
this.ctx = ctx;
this.req = req;
}
public String getUrl() {
return this.req.uri();
}
public String getMethod() {
return this.req.method().name();
}
public Map<String, List<String>> getParams() {
QueryStringDecoder decoder = new QueryStringDecoder(req.uri());
return decoder.parameters();
}
public String getParam(String name) {
Map<String, List<String>> params = getParams();
List<String> strings = params.get(name);
if (strings == null) {
return null;
}
return strings.get(0);
}
}
|
GlResponse 基于Netty&FullHttpResponse的API操作
FullHttpResponse作为返回请求的主体;
1
2
3
4
5
6
7
8
9
10
11
12
13
14
15
16
17
18
19
20
21
22
23
24
25
26
27
28
29
30
31
32
33
| public class GlResponse {
private ChannelHandlerContext ctx;
private HttpRequest req;
public GlResponse(ChannelHandlerContext ctx, HttpRequest req) {
this.req = req;
this.ctx = ctx;
}
public void write(String string) throws Exception {
if (string == null || string.length() == 0) {
return;
}
try {
FullHttpResponse response = new DefaultFullHttpResponse(
HttpVersion.HTTP_1_1,
HttpResponseStatus.OK,
Unpooled.wrappedBuffer(string.getBytes("UTF-8"))
);
response.headers().set("Content-Type", "text/html");
ctx.write(response);
} catch (Exception e) {
e.printStackTrace();
} finally {
ctx.flush();
ctx.close();
}
}
}
|
GlServlet 定义抽象servlet,定义GET方法和POST方法
定义抽象的Servlet和doGet方法和doPost方法,具体的业务去实现自己的方法和逻辑;
1
2
3
4
5
6
7
8
9
10
11
12
13
14
15
16
| public abstract class GlServlet {
private final static String GET = "GET";
public void service(GlRequest request, GlResponse response) throws Exception {
if (GET.equals(request.getMethod())) {
doGet(request, response);
} else {
doPost(request, response);
}
}
public abstract void doGet(GlRequest request, GlResponse response) throws Exception;
public abstract void doPost(GlRequest request, GlResponse response) throws Exception;
}
|
FirstServlet 具体的业务Servlet实现抽象Servlet的方法
1
2
3
4
5
6
7
8
9
10
11
12
13
| public class FirstServlet extends GlServlet {
@Override
public void doGet(GlRequest request, GlResponse response) throws Exception {
this.doPost(request, response);
}
@Override
public void doPost(GlRequest request, GlResponse response) throws Exception {
response.write("This is first servlet from NIO");
}
}
|
SecondServlet 具体的业务Servlet实现抽象Servlet方法
1
2
3
4
5
6
7
8
9
10
11
12
| public class SecondServlet extends GlServlet {
@Override
public void doGet(GlRequest request, GlResponse response) throws Exception {
doPost(request,response);
}
@Override
public void doPost(GlRequest request, GlResponse response) throws Exception {
response.write("This second request form NIO");
}
}
|
web-nio.properties 配置文件
配置请求和处理器,Spring中是通过Controller下的@XXXMapping注解去扫描并加载到工厂的;
1
2
3
4
5
| servlet.one.className=com.ibli.netty.tomcat.nio.servlet.FirstServlet
servlet.one.url=/firstServlet.do
servlet.two.className=com.ibli.netty.tomcat.nio.servlet.SecondServlet
servlet.two.url=/secondServlet.do
|
GlTomcat
启动服务端,在网页中访问本地8080端口,输入配置文件中定义的url进行测试:
1
2
3
4
5
6
7
8
9
10
11
12
13
14
15
16
17
18
19
20
21
22
23
24
25
26
27
28
29
30
31
32
33
34
35
36
37
38
39
40
41
42
43
44
45
46
47
48
49
50
51
52
53
54
55
56
57
58
59
60
61
62
63
64
65
66
67
68
69
70
71
72
73
74
75
76
77
78
79
80
81
82
83
84
85
86
87
88
89
90
91
92
93
94
95
96
97
98
99
100
101
102
103
104
105
106
107
108
109
110
| public class GlTomcat {
private final Integer PORT = 8080;
private Properties webXml = new Properties();
private Map<String, GlServlet> servletMapping = new HashMap<String, GlServlet>();
public static void main(String[] args) {
new GlTomcat().start();
}
private void start() {
init();
EventLoopGroup bossGroup = new NioEventLoopGroup();
EventLoopGroup workGroup = new NioEventLoopGroup();
ServerBootstrap server = new ServerBootstrap();
server.group(bossGroup, workGroup)
.channel(NioServerSocketChannel.class)
.childHandler(new ChannelInitializer() {
@Override
protected void initChannel(Channel client) {
client.pipeline().addLast(new HttpResponseEncoder());
client.pipeline().addLast(new HttpRequestDecoder());
client.pipeline().addLast(new GlTomcatHandler());
}
})
.option(ChannelOption.SO_BACKLOG, 128)
.childOption(ChannelOption.SO_KEEPALIVE, true);
ChannelFuture future = null;
try {
future = server.bind(this.PORT).sync();
System.err.println("Gl tomcat started in pory " + this.PORT);
future.channel().closeFuture().sync();
} catch (InterruptedException e) {
e.printStackTrace();
} finally {
bossGroup.shutdownGracefully();
workGroup.shutdownGracefully();
}
}
private void init() {
try {
String WEB_INF = this.getClass().getResource("/").getPath();
FileInputStream fis = new FileInputStream(WEB_INF + "web-nio.properties");
webXml.load(fis);
for (Object k : webXml.keySet()) {
String key = k.toString();
if (key.endsWith(".url")) {
String servletName = key.replaceAll("\\.url", "");
String url = webXml.getProperty(key);
String className = webXml.getProperty(servletName + ".className");
GlServlet obj = (GlServlet) Class.forName(className).newInstance();
servletMapping.put(url, obj);
}
}
} catch (Exception e) {
e.printStackTrace();
}
}
public class GlTomcatHandler extends ChannelInboundHandlerAdapter {
@Override
public void channelRead(ChannelHandlerContext ctx, Object msg) throws Exception {
if (msg instanceof HttpRequest) {
HttpRequest req = (HttpRequest) msg;
GlRequest request = new GlRequest(ctx,req);
GlResponse response = new GlResponse(ctx,req);
String url = request.getUrl();
if (servletMapping.containsKey(url)){
servletMapping.get(url).service(request,response);
}
else {
response.write("404 Not Fount");
}
}
}
}
}
|
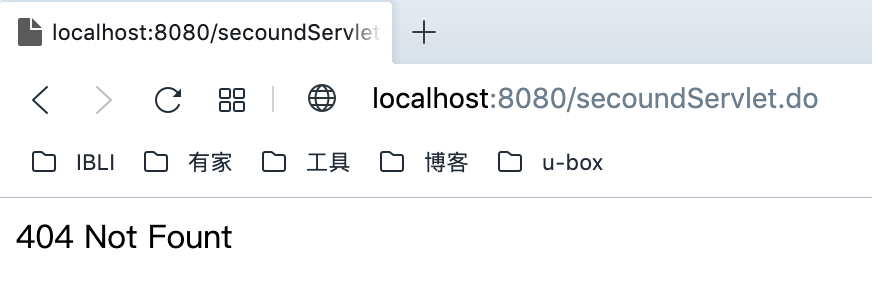
测试结果
请求 : http://localhost:8080/secoundServlet.do 这的地址写错误 ⚠️

请求 : http://localhost:8080/secondServlet.do


